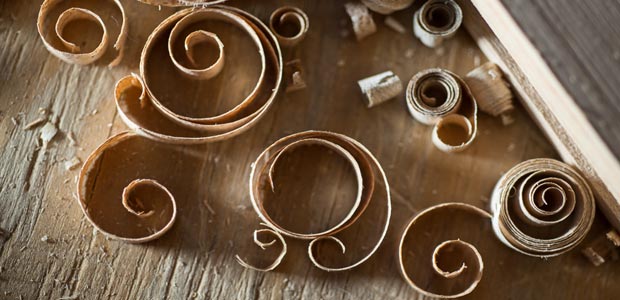
Even the smallest scrap of wood can be crafted into something special (Image: Horn Designs)
In memory of my father and the curls I used to play with, wood is something that I hate to waste. When I was a little girl, I used to watch my father as his strong arms and hands pushed a plane again and again along the grain of a piece of wood. The plane would skim off a thin layer of the wood, which for some reason always curled up rather than just hang in a long peel.
 My father’s curls of wood were of different sizes and colors with wonderful, earthy aromas that I used to inhale as I picked them up from the floor. I used put them on my fingers like rings. Walnut had a peppery smell; Pine had the traditional smell of fresh and outdoorsy; Redwood, the old growth redwood, deep red in color, had an earthy smell, much like truffles that grow underground.
Storing Salvaged Wood for Projects – Even Tiny Scraps Can be Used Creatively
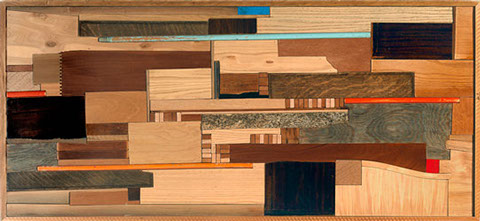
Boston artist, Jeff Smith, creates sculptures from salvaged wood scraps (Image: jeffsmith.org)
I watched as my father constructed tables, dressers, lamps, and beds – all beautifully hand made with exquisite care and attention to detail. I also watched him as he carefully stacked all leftover pieces of wood by size and variety. Over the years, I saw more items emerge from my father’s shop, some as small as salt shakers made from a last small scrap of walnut.
Making Handmade Toys From Saved Wood that Will Last a Lifetime
When my youngest child began preschool, I enrolled in the local community college and took woodworking courses. I had seen handmade wooden toys that I liked but could not afford. The teacher was patient, and the tools were familiar to me. I happily cut, planed, glued, and clamped salvaged wood. My grandchildren are now playing with some of the toys that I made, like my stick-horses. Scroll down to learn how to make your own stick-horse from salvaged wood.
Respecting Our Precious Wood Resource While Using Every Bit Of It
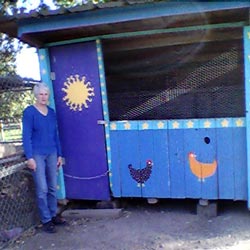
The chicken coop that Tamara built with nothing but wood scraps (Image: Tamara Maren)
A few years later, I began building my house. I worked alongside the contractors, and when my house was completed, I stacked the abundant salvaged wood in my shed. Over the years, I have used the wood I saved as I constructed a chicken coop, a playhouse, a tack box, saddle racks, picture frames, and other items. Each time that I use wood from that now quite diminished stack, I think about how many years a tree grew before it was cut, milled, and hauled to the lumber yard. I am still making use of every bit of it; I never throw any usable piece away until it’s so small it becomes firewood.
I would love to know if there is anyone else out there who continues their family tradition of making things from saved wood by hand. What projects have you constructed from wood that you’ve either saved yourself over time or salvaged?
![]()
Directions for Making Your Own Stick Horse
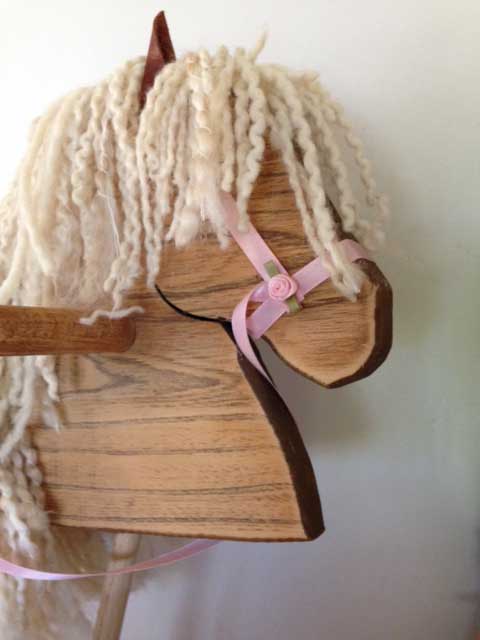
This stick-horse made from salvaged wood is a special and low-cost toy that your children and grandchildren will love (Image: Tamara Rible)
1. The horse head is made from a piece of 2X 6. I cut the shape out using a bandsaw. One of the pictures that I sent shows the shape (the mane is pushed out of the way.) Anyone can draw any shape they want. Horses heads are all different. But the wood is heavy, so if it’s for a small child, limit the overall size.
2. The next step is to drill a 1 inch hole straight through the head for where the handle goes. Again, refer to the picture. The handle should be long enough that it extends about 4 inches on each side of the head. That means it needs to be about 10 inches long to go through the 1 and 3/4 inches of the wood and protrude out each side by about 4 inches. I lightly sand the edges of the ends so that they’re rounded and smooth.
3. I turn the head upside down and on a table saw, make a groove 1/2 inch deep and 3/8 inch wide, starting from the highest point of the head and going down the horse’s neck all the way to the bottom of the piece of wood. Table saws have a guide rail that keeps the wood being cut perfectly in line with the cutting blade, and the wood is pushed along with a “push piece” so that the operator’s fingers don’t get near the blade. But to cut this groove in the horses’ neck, I have to rotate the piece of wood by hand against the blade while keeping one side against the guide bar. If a person isn’t experienced with table saws, it would be best to get someone who is to make this cut.
4. Once the groove is made, the mane can be constructed. This is the fun part. I lay flat a piece of 3/8 ” bias tape the same length as the groove. Then I lay all the pieces of yarn that will make the mane and forelock across the tape, basically half of the length on each side of the tape. The pieces of yarn should be about 6 to 8 inches long. They do not have to be the exact same length or perfectly lined up — it’s the irregularity that gives the mane and forelock a slightly unruly look. And the yarn can always be “trimmed.to taste” after it is installed in the groove. Also, the yarn should be somewhat “stacked,” in other words, not laid one single piece of yarn next to another single piece of yarn, but rather in bunches of 2 to 3 pieces or 3 to 4 pieces and then all the bunches scrunched up alongside each other. Then hold the yarn flat and sew all the yarn to the bias tape with fairly large (1/8″) stitches. I have made these horses for little redheaded girls and used red and orange colored yarn. Sometimes I use all different colors mixed up. It just depends for whom the horse is intended and what you know about the parents’ tastes. Some yarns are made that already have a variety of colors, blending from one to another. The possibilities are endless.
5. Once the yarn is sewn to the bias tape, the bias tape must be pressed down into the groove (yarn side up so the bias tape won’t be seen if it pokes slightly higher than the groove) with a flat edged screwdriver. Once it’s stuffed into place, I hammer a few finishing tacks through it into the bottom of the groove to secure it. (The tacks must have small enough heads to fit inside the groove.)
6. Next come the ears. I cut them from thin brown vinyl. In one picture, I pushed the mane off to one side show the location for the ears, but it’s not an exact science. Horses’ ears are like people’s — all different. But you need to make the ears long enough that there’s enough vinyl to tack them to the horse head. I use the same small tacks to hold the vinyl ears in place as I do to secure the mane in the groove. I have had a few ears “rotate,” move forward or backward, so I added a spot of glue from a glue gun to them to help keep them in place. Once the ears are in place, pull some of the yarn forward so that it goes between the ears and becomes the forelock. The rest of the yarn will be the mane going down the neck. Play with it. I personally like a heavy forelock — it gives a pony look. Again, trimming a little here and there finishes it off.
7. I buy a one inch dowel from the lumber yard for the stick. and cut it to whatever length will work for the child who will get the horse. I sand the edges of one end so it’s smooth, and the other end goes in the hole of the horse’s neck which I drill in the center of the bottom of the head at an angle. I don’t think any angle has been the same. I just estimate it. You can see from the picture the approximate angle. I put the head in a clamp and use an electric drill. Once the dowel is tested for fit (It might need a little sanding), I put a little glue in the hole and insert the dowel.
8. Bridle optional: If you want to fit one to the horse, just cut the pieces and glue in place.
Posting Guideline – Opinions expressed are solely those of the contributors and implies no endorsement by WeHateToWaste. Stories published on WeHateToWaste.com are intended to prompt productive conversations about practical solutions for preventing waste. Please issue your comments accordingly.


Growing up, I was blessed to have an elementary school that taught us wood working throughout all of our years (pre-school – 8th grade). It is an art that has been discarded. It is inspiring to see someone picking up all that left over wood and putting it to good use. Another great use for salvaged wood is making a composting area (small fenced in square) in the yard for all the ‘waste’ our yards generate
My husband and I operate two lodging properties in Grand Lake, Colorado. Both places were originally built with salvaged materials. Mountain Lakes Lodge was made from thrift store finds, fallen trees, the neighbor’s steel siding that was be replaced, old bluejeans and such. North Shore Resort was built over a number of years, largely from materials salvaged from the flooding of the Platte River in Denver in 1965. We use every scrap around here until it’s all used up. I recently made a headboard for a Mountain Lakes Lodge unit, from cabinet doors that came out of a remodel at North Shore Resort. The old cabinet doors served as the base for the headboard, which looks like the house from Grant Woods’ painting, American Gothic. The house is trimmed out with small scraps of wood and miniatures cut in half. By next summer, the bedding will have the clothes from the painting appliqued on, so when guests pull up the covers, they’ll be “in the painting.” Pictures of it are on our website and our Pinterest page.
I’ve never had any experience with wood working so I guess I’ve never really been concerned with wasting wood! I have however done extensive research on sustainable sourcing of wood products and know how corrupt and ambiguous this area is. Most of the time, it is impossible to know where wood has come from. Unless the wood you buy has a credible sustainability certification, then it is likely that it has come from a black market operation, which wreaks havoc on ecosystems and communities. Using this wood on the first place isn’t a great thing to do, but wasting this wood would be just terrible! So thank you Tamara for sharing ways to stop wood from being wasted.
Great post. The memories and emotion, respect for nature and tradition that are bound up in those wooden toys, furniture and picture frames further illustrate the special meaning that such possessions can hold for us. Here’s to our “love stories,” just in time for Valentine’s Day. http://www.wehatetowaste.com/the-deep-meaning-of-possessions/
I do not have personal experience with woodworking, but similar to Tamara, I have a connection through my father. He is a general contractor who began his career working at the construction sites doing the building himself. When my sisters and I were very young, he built the house we grew up in, so we were always surrounded by his endless ‘from-scratch’ wood projects. He always collected the scraps from his construction sites and would bring them home and make things like benches, coffee, tables, picture frames shoe racks, etc. all from leftover construction materials!
Additionally, living at the Jersey Shore my family is always collecting drift wood from the beaches. Using drift wood for rustic looking projects was always one of my parents’ favorite hobbies, and still is! My dad recently made me a beautiful full-length mirror for my apartment all out of drift wood found on the beach, bringing a little bit of the beach to NYC for me!
I am not a woodworker, but I am inspired by the creativity that’s unleashed when we try to reduce waste. I am very interested in sustainable fashion and am always amazed the some of the most beautiful, interesting and unique outfits are made by repurposing old textiles. For those who are interested, Sass Brown’s book Refashioned highlights some of the designers/artists who are creating new fashion from recycled fabrics.
Neither myself or a family member had done any wood carving, but the idea of using reclaimed wood for household projects (large and small) not only help reduce waste, but they also have such a unique charm. People do not realize how much gets wasted, especially during construction processes. Are there any programs for construction companies to donate wood scraps that are “unusable” or too small for thier projects? Do they usually just throw all the scraps out?
I really enjoyed reading your article, Tamara. I could almost smell the wood by the way you described it. My experience with wood is limited to making a birdhouse, but I would love to take a class like you did. Your horse looks great, and I love that you’ve kept all of your wood and continue to make use of every single bit. Where in the spectrum of birdhouse to stick horse would you place a wooden picture frame? I think that might be more within my DIY capabilities. Keep up the good work!
I share your passion for using salvaged wood Tamara, and enjoyed reading your inspiring story. I am often compelled to find a way to make use of discarded or unused things, such as repurposing left over wood that has accumulated from construction and renovation projects on our family farm in Vermont.. As a youngster my family and I built a small cabin using only left over wood, mix-matching new scraps with old weathered barn wood. During my visits home over the past 5 years, I have used our stockpile of scrap wood for constructing a woodshed on the farm, a bar and countertop for my NYC apartment, and a variety of yard games, expanding my repertoire as a game enthusiast. I made a Kubb set with 3x3s and old fence posts, 2 pairs of Cornhole boards (one as a Father’s Day gift and the other for myself) with 2x4s, plywood, and old tablecloths (for the sacks), as well as a quiver of Lawn Darts out of saplings, using cardboard for fins and large nails for points. I use these games regularly and tell the story behind them to help others realize the fruits that salvaged goods can bear when paired with ingenuity and a DIY mindset.
Tamara, it is all very admirable, but I am (also) wondering if you are the Tamara Paulsen I knew growing up in La Jolla? I am ‘Dudie’,or Julia, one of the twins that you gave horse rides to and eventually got my sister (Dessie) and I into the horses at the stables? If so… I can be reached by email: becky@ortelco.net (becky is my dog) It would be so much fun to connect with you. I am living in Oregon, Dess is living in Nevada. thanks… Julia